Ok, now that we have done the hello world and learned how to dockerize a microservice, Let's write something useful that provides some value and something we can build an application around. A simple task service for creating and tracking task status is always handy and needed in just about every enterprise application you can find.
Step 1: Generate your project again. Notice we added the JPA, H2 and Lombok dependencies. JPA so we can connect to a DB and store information, H2 just for testing purposes, we will show you how to remove this and connect to a dockerized database later. Finally Lombok just to remove some easy template code.

Step 2: Copy in your Dockerfile and add in the gradle plugin, make sure you change your entrypoint if needed.
Dockerize my Microservice
Step 3: Create Task Entity
Let's create out task entity. Thins go note:
@Data - Used to generate getters and setters
@Entity - Declares this a JPA entity for interaction with our database
@Id / @GenerateValue - Declares field as unique id and will be a generated value by the database
@CreationTimestamp / @UpdateTimestamp Used for setting the creation and update time of an entity so it happens with no additional code.

Step 4: Create Task Repository
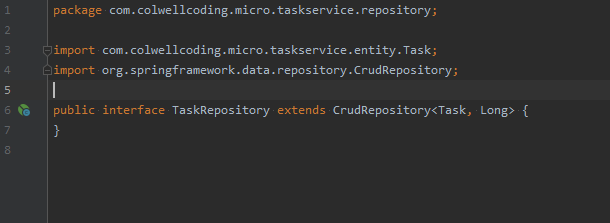
Now we need a Task Repository used for managing all our CRUD operation. Spring makes this super easy for all the basic operations and we just need to extend the standard interface. Take note CrudRepository uses out Task entity and the data type of our @Id.

Step 5: Create Task Controller
Time for our Resource! But lets keep it simple... just a find, creat and update should be enough to start. Notice we marked our @RequestMapping at the top with "v1". I prefer to mark it hear so I can run multiple versions in the same micro if needed for easier n-2 support but I am sure there are competing thoughts around this.

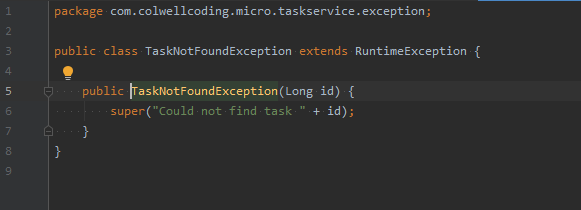
We also are going to create and example task not found exception and adviser for improved error handling. Its just a standard custom runtime exception attached to a @ControllerAdvice being mapped through @ExceptionHandler.


Step 6: Make RESTful
Time to make our @GetMapping truly RESTful. To make somethig truly RESTful we need to give our user the ability to interface with us without having to hard code our API Url. Enter in Spring HATEOS! So lets add this to our build.gradle and our TaskController so we can take a look at how this works.


Step 7: Let's Take a look at our results in Postman

Reference Links:

Comments